Hey guys, here I am going to show you how you can turn a few photographs into a nice deatailed photoshop painting...
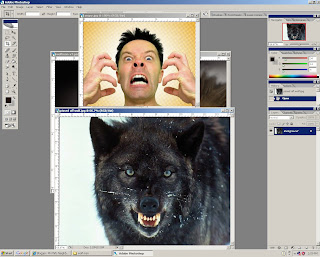
First you need to pick some starting images...
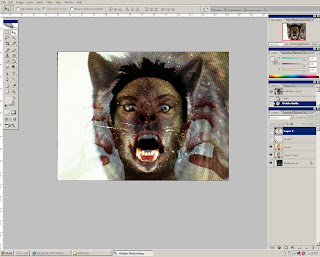
Now, take the image of the wolf and add the picture of the man on a new layer. Scale the picture of the guy up so that they eyes are in the same approximate position and then duplicate the layer. Set the top layer to "soft light" layer mode, and the second layer to "overlay". Drop the saturation of this image so it has a little color left in it, but is mostly black and white. You should not have touched the layer with your wolf picture on it. The image should look something like this...
The next thing you should do is make a large brush and black out some of the background around the edges to keep from getting distracted. Next, use your dropper tool (alt) to sample colors right off the picture so your color pallet fits with the image you have. Use a basic round brush so start blocking in basic detail and to start to merge your photos into a single seamless image...
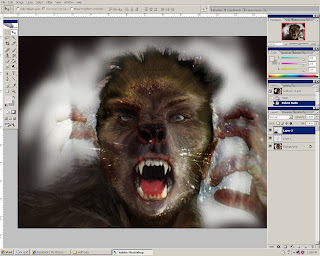
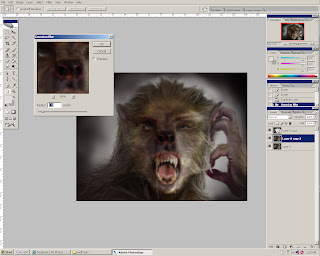
Now it is time to use the LIQUIFY tool, found in the filter dropdown menu, to shape your creature. Pull out the brows a bit and narrow the eyes to make your wolfman feel fierce.
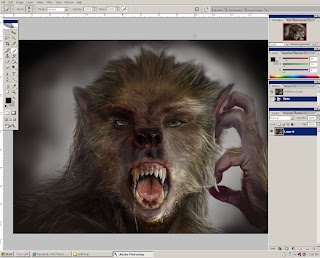
Now you can really start playing with the form of the creature. Add eyelids and other small details to the image, but try not to spend too much time in one area of the painting. Work fast and loose, suggesting detail by working over areas fast with multiple colors all sampled from the image. Long brush strokes will add a hint or realism to your painting. Now your wolfman should be taking form...
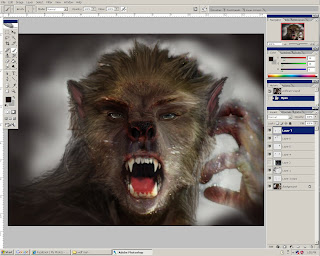
Grab the hand off of the original image of the guy and scale it up to fit our new image. You can elongate the hand to make it feel more like a creature, and less like a human. Lower the saturation on the hand and play with the curves and brightness of the picture to make it match the tones in you wolfman. Use similar techniques on the hand, adding some hair to it to help pull it together with the rest of the painting. Remember, long strokes and work fast. Once again it will help you from working one area too much and will help the whole piece. Its importaint to make sure the face is the strongest part of your image, but dont ignore other areas of your painting because of this.
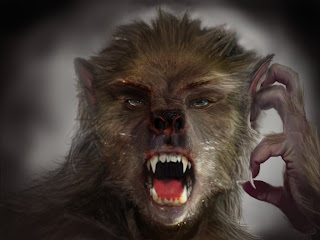
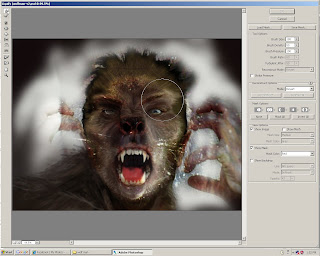
Now that your wolfman is almost finished, start adding small details, highlights on the nose, some drool and highlights to the hair. Put the highlights on their own layer and set it to "overlay" to make them pop. For added detail, use pictures to for the mouth, and blend them together using the LIQUIFY tool and changind the colors to make them fit. Finish it off with you final details, and you should have a nice looking wolfman.
To really make your wolfman pop, merge all the layers and duplicate it. Add a GAUSSIAN BLUR to the top copy of your painting.
Now erase parts of the blured picture that are closer to the viewer like the hands, nose, eyebrows and eyes, leaving the slight blur on things thats a further, lik the ears and shoulder. This will cause the face to stand out more and give a bit more depth to you painting
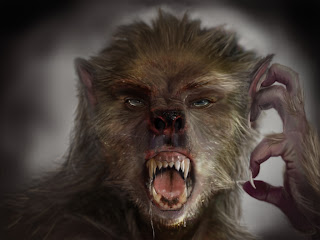
. Congrats my friends, you have just finished your very own wolfman. If you have any other questions just let me know and I will help as best as I can.


